

Good hiking uphill and downhill technique starts with keeping your body aligned as the ground changes under you. ChiWalking builds that alignment on pavement, and the same principles carry onto the trail, whether you are walking a gravel path or climbing toward a summit. Here is how to apply them on hills and rough terrain.
Key Takeaways
- Good hiking uphill and downhill technique starts with the column: ears, shoulders, hips, and ankles stacked so your skeleton carries your weight on any slope.
- Going uphill, shorten your stride, quicken your cadence with a compact arm swing, and let each foot land beneath your body instead of pushing off your toes.
- Going downhill, resist leaning back. Keep soft knees, a level pelvis, and short, quick steps that land under your hips.
- On rocky or uneven trails, treat your aligned posture as a home base and return to it after every obstacle.
How Does ChiWalking Apply to Hiking?
ChiWalking applies to hiking by keeping the same aligned, relaxed posture you use on pavement and adjusting your stride, cadence, and arm swing to the terrain. The foundation is the column: ears, shoulders, hips, and ankles stacked in a vertical line so your skeleton carries your weight and your legs stay relaxed. You build it by lengthening through the crown of your head. ChiWalking is also a mindful practice, built on Five Mindful Steps that pair alignment with focused attention. If you are new to the method, start with how ChiWalking works.
On pavement, that posture stays steady from step to step. On a trail, the ground changes constantly, so the skill becomes returning to the column again and again as the slope and surface shift.
The technique is easiest to learn on pavement first, where you can focus on your form without roots and rocks pulling at your attention. A ChiWalking workshop is the fastest way to get the basics into your body before you take them onto the trail.
How Should You Walk Uphill When Hiking?
Walk uphill with shorter, lighter steps, a slightly quicker cadence, and your feet landing beneath your body. Keeping your flat-ground stride on a climb forces you to reach forward and pull yourself up with your hip flexors and quads, which tires them quickly.
- Keep the column with a slight hinge at the hips. Your body stays in one long line from crown to ankles, tilted slightly into the slope.
- Shorten your stride. Short steps keep the effort in your core and off your quads.
- Quicken your arm swing. A compact, quick arm swing drives a quicker leg turnover, so momentum does more of the work. Bring your hands up, closer to your shoulders as your hands swing toward your chin (upper cut – elbow to ribs) and to the rear (wrist to ribs).
- Land beneath your body. Let each foot land just in front of the heel, under your center of mass, and lift the knee and ankle together instead of pushing off your toes.
- Turn sideways on steep grades. As the hill steepens, turn your body toward a 10 o’clock or 2 o’clock position, adjust your arm swing to cross your body, and use a short side step. Be certain not to step over the uphill foot.
How Should You Walk Downhill Without Hurting Your Knees?
To protect your knees going downhill, resist the urge to lean back and brake with your heels. Leaning back puts your weight behind your feet, so each step lands hard and sends the shock up into your knees and lower back.
- Bend your knees to lower your body. Picture yourself in a scooted down position, with your core engaged, your pelvis level, and your body staying over your feet rather than behind them.
- Keep your knees bent. Soft, relaxed knees absorb each step. Never lock your legs on a descent.
- Take shorter, quicker steps. Unlike walking on other surfaces, when walking down a steep hill, your step rolls from heel to toe.
- Land under your hips. Keep your feet pointed downhill and let them land softly beneath your hips, using your core to absorb the weight shift.
Common Hiking Advice vs. ChiWalking
Much of the standard advice for hills works against good alignment, especially on descents. Here is how the ChiWalking approach differs.
Situation | Common advice | ChiWalking approach |
Uphill posture | Lean forward from the ankles | Keep the column and hinge slightly from the hips. |
Uphill foot placement | Flat-foot every step | Land beneath your body and lift the knee and ankle together |
Downhill posture | Stay upright or lean back slightly | Keep your body over your feet in a scooted down position |
Downhill foot placement | Heel-strike gently | Land softly under your hips without braking while rolling heel to toe |
Steep grades | Zigzag on the way down | Lateral step at 10 or 2 o’clock going up, angle across the slope going down |
How Do You Keep Good Form on Rocky or Uneven Trails?
Keep good form on rough trails by treating your aligned posture as a home base. Roots, rocks, and mud will force you to change your stride, but after each obstacle, come back to the same three things: lengthening through the crown of your head, an engaged core, and a consistent stride with your feet landing under you.
Trails also change how you practice mindfulness. On pavement, your attention can turn inward to refine your alignment, breathing, and relaxation. On a trail, that same mindful focus turns outward, continuously reading the path ahead while you hold your form. That steady attention is what keeps your movement fluid instead of reactive.
Pavement | Trail | |
Surface | Hard, flat, and predictable | Soft and uneven, with roots, rocks, and mud |
Gaze and focus | Soft gaze well ahead, attention free to turn inward | Gaze 10 to 15 feet ahead, scanning for footing |
Stride | Steady rhythm and a consistent arm swing | Shorter, adaptable strides, a varied arm swing, and lateral steps on steep uphill slopes |
Main physical work | Holding alignment to absorb hard impact | Core stability and constant small balance adjustments, with pelvic rotation extending into the obliques |
Ready to Take ChiWalking onto the Trail?
Hill technique is easiest to learn in person, where an instructor can watch what your body does on a slope and help you adjust on the spot. A workshop or a session with a certified ChiWalking instructor gets the fundamentals into your body before your next hike.
If you would rather start at home, the ChiWalking Book & DVD Package teaches the full technique step by step. Not sure which route fits you? Here is how to choose the best way to learn.
Frequently Asked Questions
Should you lean forward or back when hiking downhill?
Do not lean back. Keep your body over your feet and scoot down with bent knees, keeping your core engaged and your pelvis level. Leaning back shifts your weight behind your feet and turns every step into a heel brake that loads your knees.
How do you keep your knees from hurting on downhill hikes?
Keep your knees soft, shorten your steps, and land softly rolling your foot heel to toe under your hips instead of braking with your heels. Short, quick steps keep momentum from building, and bent knees let your legs absorb each landing.
Why do my calves burn when hiking uphill?
Calves often burn on a climb when each step pushes off the toes. In ChiWalking, the foot lands beneath the body and leaves the ground by lifting the knee and ankle together, which takes that repeated push off your calves. Shorter steps help too.
Should you learn ChiWalking before using it on the trail?
Yes. Learning the basics on pavement first lets you focus on alignment without roots and rocks competing for your attention. Once the column and a relaxed stride feel natural, carrying them onto a trail is much easier. A ChiWalking workshop is the quickest way to get there.
Meet the Author’s

Vince Vaccaro
Vince Vaccaro is a Master ChiRunning®/ChiWalking® Instructor and owner of ChiLiving, ChiRunning, and ChiWalking. Certified since 2005 and trained personally by Danny Dreyer and Chris Griffin, Vince has spent decades helping runners and walkers move with greater ease, less effort, and fewer injuries.
ED COTGAGEORGE
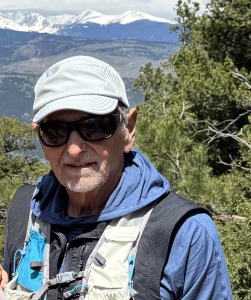
Ed Cotgageorge is a Certified ChiWalking® Instructor who specializes in hiking on and off the trail in the mountains. First certified as a ChiRunning® Instructor in 2010 and re-certified as a ChiWalking Instructor in 2025, Ed teaches hiking clinics for Colorado Mountain Club participants, helping hikers improve their form, performance, and endurance on moderate and steep hills.


